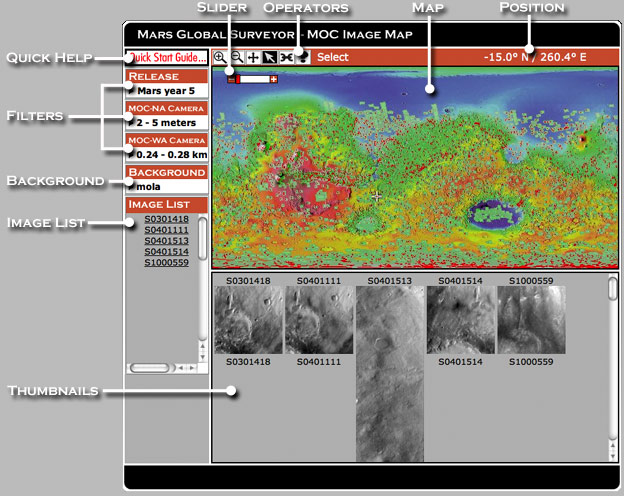
Each map element (Operators, Filters, etc.) has a specific function, described below.
At the end of this guide are some useful hints and suggestions.

|
Clicking this icon pops up a highly condensed guide to finding MOC
images, aimed at first-time users.
|
|
Operator buttons control what a mouse click on the map does.
|
|

|
After you click the Zoom In operator button, a mouse click on the map recenters the map on that point and zooms in by a factor of about 2. You can zoom in repeatedly. Distortion will occur in some areas, because the map is a simple cylindrical projection.
|

|
After you click the Zoom Out operator button, a mouse click on the map recenters the map on the point and zooms out by a factor of 2. You can repeat this until the whole map is visible.
|

|
After you click the Pan operator button, a mouse click on the map recenters the map on that point without changing the magnification.
|

|
After you click the Select operator button, a mouse click anywhere on the map looks for a MOC image covering that point. If any exist, a link for each
image appears in both the Thumbnail frame and the Image List. Click either the
thumbnail or the reference number to open a new browser window with details of that image and downloading options.
|

|
Clicking the Link to this Page operator button creates a link in your browser's address window that captures the current filters,
map background, zoom-in state and chosen images. If you save the link as a Bookmark or a Favorite, you can return to that point at any time.
|

|
Clicking the Help operator button opens this user guide.
|

|
The position display gives the Martian latitude and longitude of the
mouse point in degrees and decimals of a degree. Latitude is given first and runs from 90° north to 90° south. Longitude increases eastward from 0° to 360°, measuring from the central meridian.
|

|
The slider control gives users an additional method of changing the map resolution by a factor of 2 or more. Clicking the
+ icon on the slider causes the map to zoom in by a factor of 2. Clicking the
- icon on the slider causes the map to zoom out by a factor of 2. Clicking or dragging on the slider's red bar between the + and - icons, allows the user to jump instantly to any valid map resolution.
|
|
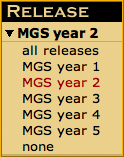
Release
The MOC began observing Mars beginning in 1999, which we label as MGS year 1. A year on Mars lasts roughly 687 Earth days. All releases are grouped by the mission year* in which the data were collected. (When the map loads, a release has been chosen.) Selecting a different release updates the map, showing the images from only that time period.
* This year count started when the spacecraft (Mars Global Surveyor, or MGS) arrived. For the purpose of long-term observations, however, scientists also have a chronological Mars year count, which began April 11, 1955. In this chronological system, MGS year 1 for MOC occurs in the middle of Mars year 24. |
|
|
Choosing all releases redraws the map to show the footprints of all images that meet the chosen camera filters (see below).
Choosing MGS year 2 retrieves image footprints from the second mars year since the start of the mission that also meet the chosen resolutions of the wide angle camera and narrow angle camera filters. Choosing none clears the map of all footprints. |
| MOC Narrow Angle Camera | ||
|
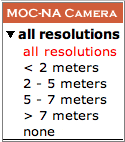
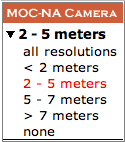
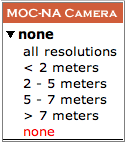
Choosing a narrow angle camera filter refreshes the map and shows only footprints of images corresponding to the chosen resolution range. This filter divides the narrow angle camera dataset into four resolution ranges: less than 2 meters, 2 to 5 meters, 5 to 7 meters, and greater than 7 meters. Narrow angle camera image footprints are shown in red on the map.
|
||
|
Choosing all resolutions
shows the footprints of all MOC narrow angle camera images for the time range specified in the Release filter.
|
|
|
Choosing 2 - 5 meters
displays the footprints of narrow angle camera images whose ground resolution is between 2 and 5 meters for the time range specified in the Release filter.
|
|
|
Choosing none
clears the map of all narrow angle camera footprints.
|
|
| MOC Wide Angle Camera | ||
|
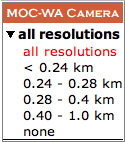
Choosing a wide angle camera filter refreshes the map and shows only footprints of images corresponding to the chosen resolution range. This filter divides the wide angle camera dataset into four resolution ranges: less than 0.24 kilometers, 0.24 to 0.28 kilometers, 0.28 to 0.4 kilometers, and 0.4 to 1.0 kilometers. Images with a resolution greater than 1 km are not contained in this web map. Wide angle camera image footprints are shown in green on the map.
|
||
|
Choosing all resolutions
shows the footprints of all MOC wide angle camera images for the time range specified in the Release filter.
|
|
|
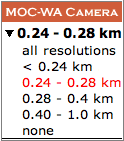
Choosing 0.24 - 0.28 km
displays the footprints of wide angle camera images whose ground resolution is between 0.24 and 0.28 kilometers for the time range specified in the Release filter.
|
|
|
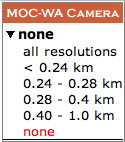
Choosing none
clears the map of all wide angle camera footprints.
|
|
|
All background maps are simple cylindrical projections and have a resolution of roughly 64 pixels per degree, or about 1 kilometer (half a mile) per pixel at the equator. The projection becomes increasingly distorted toward the poles.
|
||
|
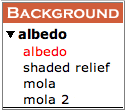
Choosing
albedo
displays a grayscale surface map derived from Viking Orbiter data. At right is an albedo thumbnail of the Valles Marineris region.
|

|
|
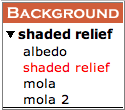
Choosing
shaded relief
displays a grayscale shaded-relief map created
from Mars Orbiter Laser Altimeter (MOLA) topographic data. At right is a
shaded-relief thumbnail of the Valles Marineris region.
|

|
|
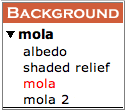
Choosing
mola
displays a vividly colored shaded-relief map derived from
Mars Orbiter Laser Altimeter (MOLA) topographic data and United States
Geological Survey (USGS) digital maps. At right is a mola thumbnail
of the Valles Marineris region. The mola background is the default
choice when the map loads.
|

|
|
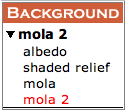
Choosing
mola 2
displays a traditionally colored shaded-relief map
derived from Mars Orbiter Laser Altimeter (MOLA) topographic data and
United States Geological Survey (USGS) digital maps. At right is a
mola 2 thumbnail of the Valles Marineris region.
|

|
|
What you see on the map reflects your current choices of filters and background.
|
|
|
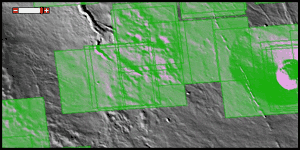
In this example, the user chose images from the Wide-Angle camera, shown here in green, on a grayscale shaded-relief background.
|
|
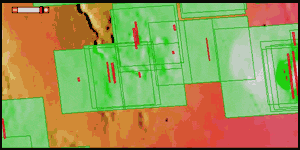
In this example, the user chose images from the wide-angle camera, as well as the narrow-angle camera, represented here as narrow red strips, on mola 2 color shaded-relief map.
|
|
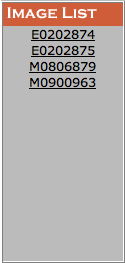
The Image List gives the reference numbers of any MOC image footprints that cover the map spot the mouse clicked on (in Select Mode).
|
|
|
In the example at left, four images were found. Clicking any of the links would pop open a
window providing detailed information about the image.
|
|
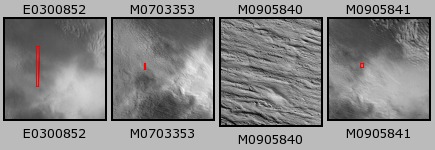
When you choose the Select operator (see above) and click on the map,
the Thumbnails frame shows small versions of any MOC images
covering the spot the mouse clicked on.
|
|
|
In this example, one narrow angle and three wide angle camera images
were found. Clicking any thumbnail pops open a window giving detailed
information about the image and choices of image formats for downloading.
|